Appian and OpenAI – Adding Dynamic Images to your Low Code Apps with DALL·E 2
Appian recently added an OpenAI plugin to its AppMarket. As you may know, the tech industry is abuzz about ChatGPT from OpenAI, but it’s not quite ready for production use for critical tasks nor is the base GPT 3.5 API available as a public API to be included in an Appian plugin. That said, we shouldn’t overlook some of the other tools with APIs provided by OpenAI, one of which is called DALL·E 2. DALL·E 2 uses artificial intelligence to generate images and art based on written descriptions that are provided to the API. The team at Appian included this in the plugin, so naturally, I started thinking through practical uses for this AI capability within a typical Low Code business application built using Appian.
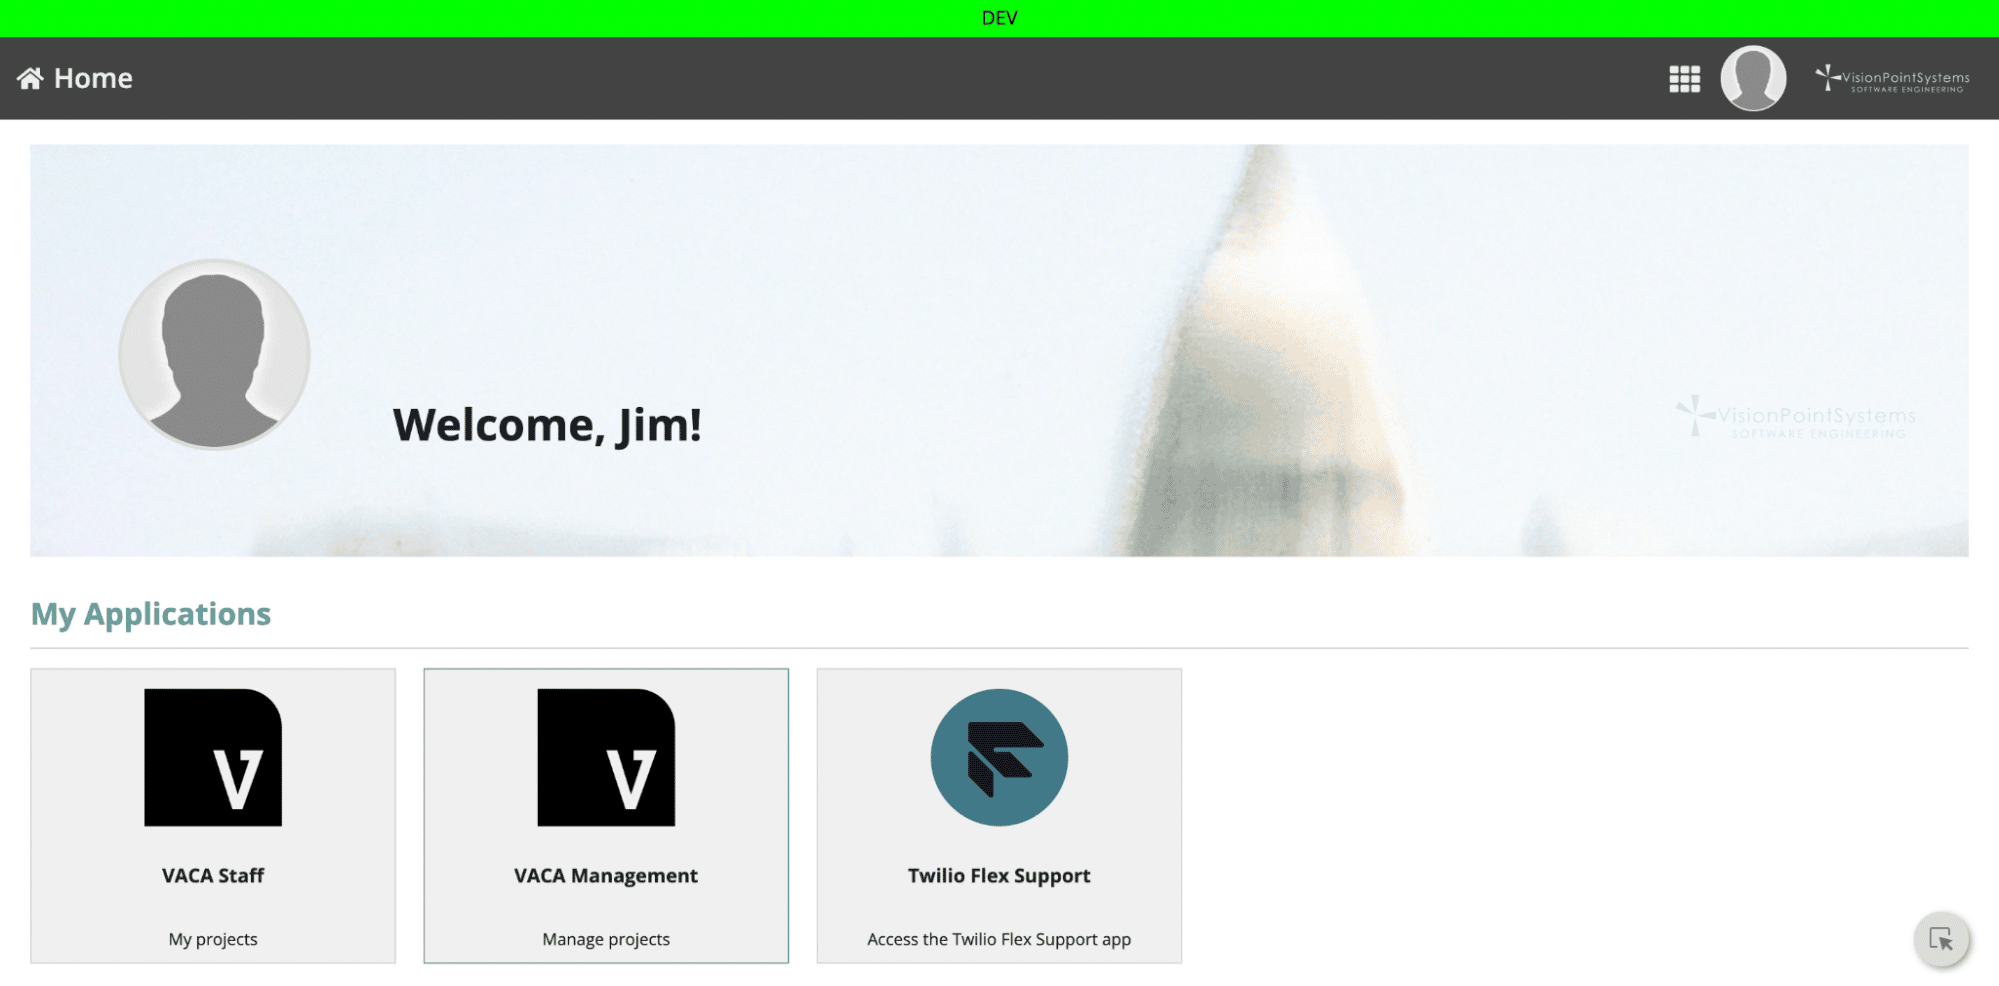
My idea was to take an Application that VPS uses for internal production today and enhance the experience using this dynamic image generation feature. This application is our internal intranet – the home page for all VPS users as they log into their Appian sites. Here’s what it looks like today:
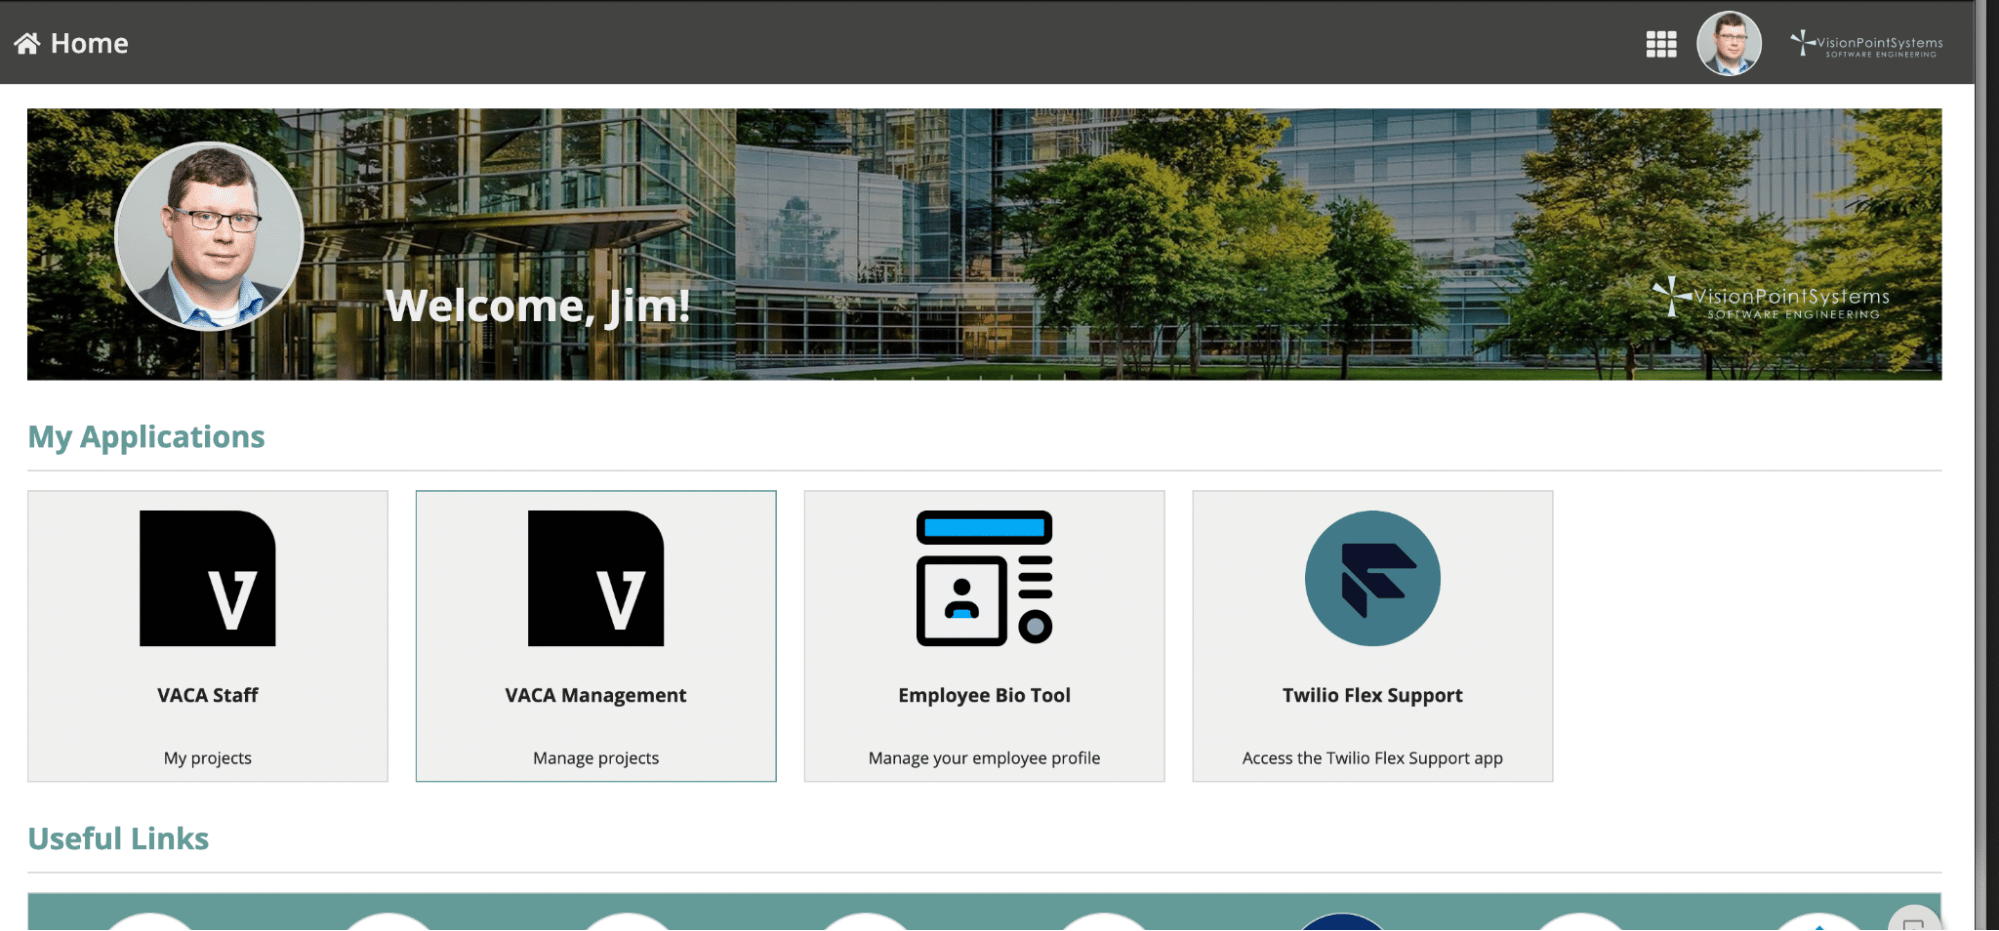
We have a nice billboard image at the top which features our beautiful offices at Valo Park in Tysons, VA. It’s great, but I think it’s a good candidate for leveraging AI to introduce some variety. I’ll be replacing this image with a new one that will change regularly to represent our different offices in an artistic way. To keep things interesting, I’ll also be incorporating the daily weather in each location!
Step 1 – Add the OpenAI plugin into Appian
This is a simple task performed by a system admin in an Appian Cloud environment. From the Admin console, browse to the plugin tab. Once there, just press the “Add Plugin” button and search for OpenAI.
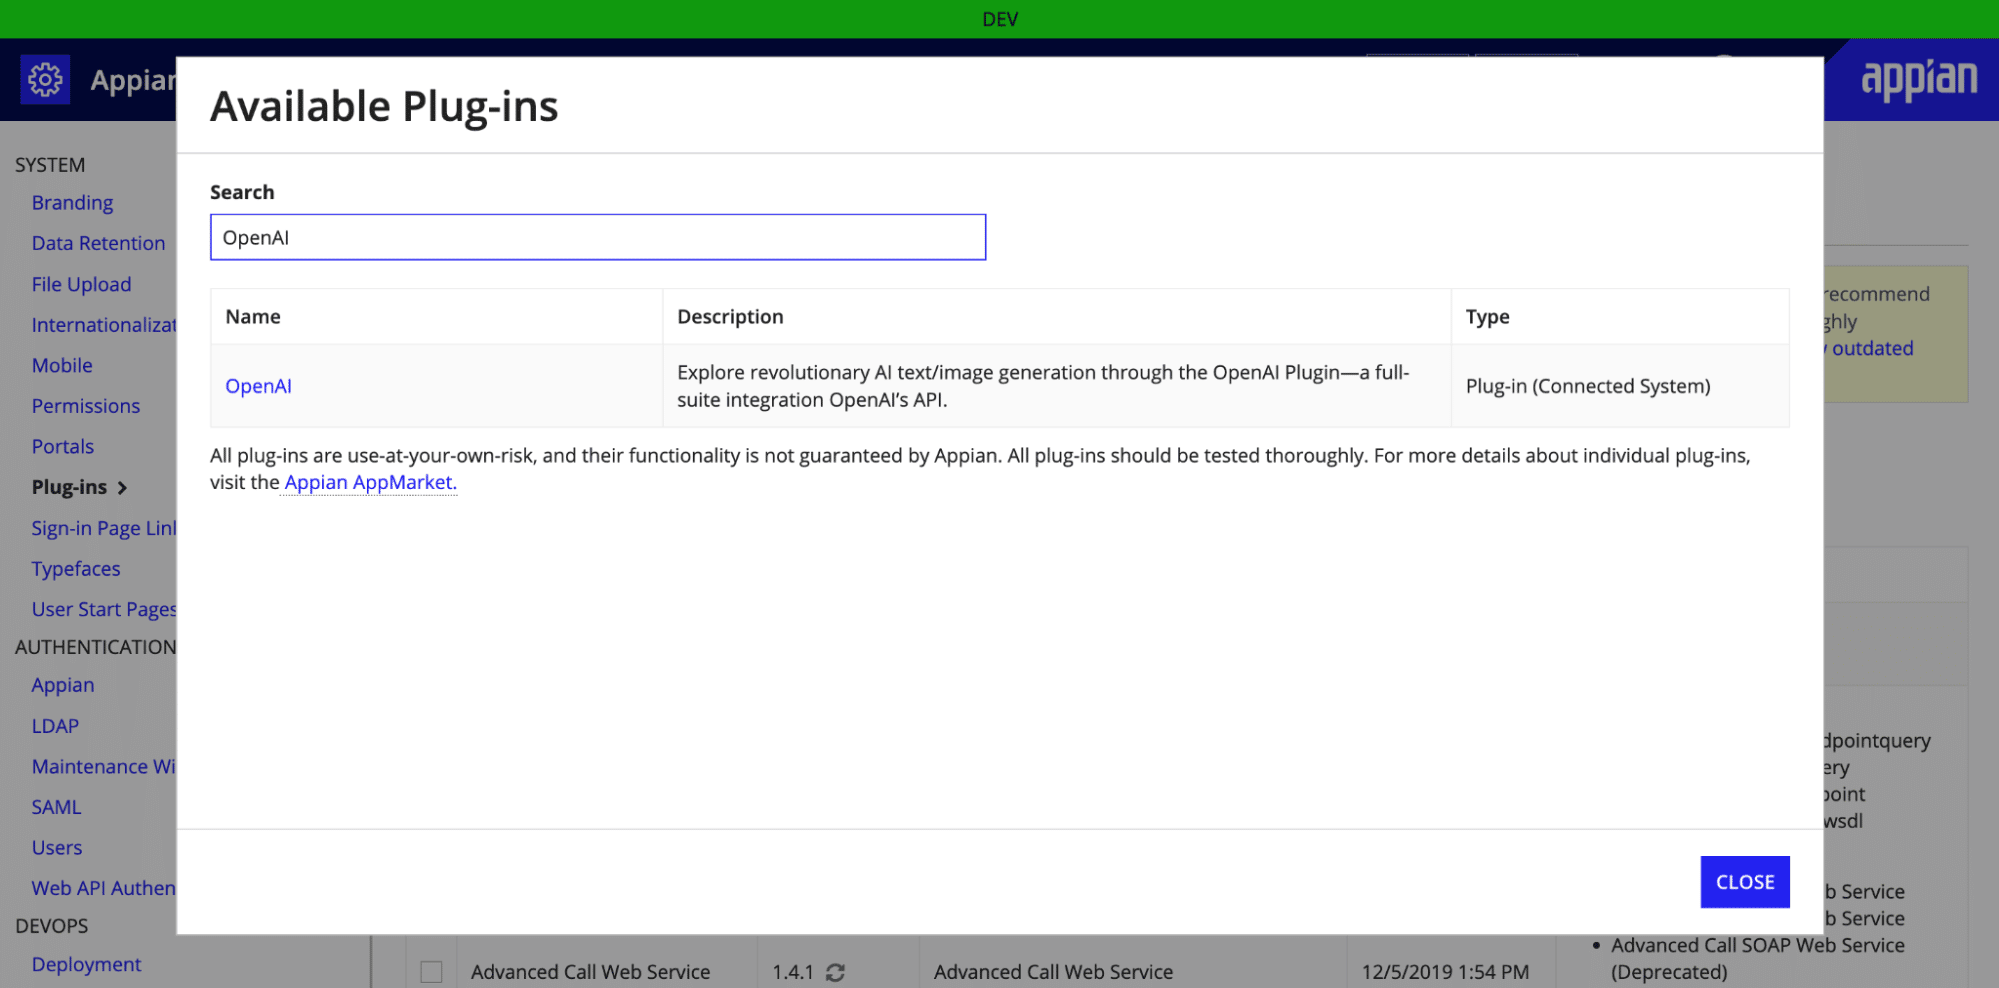
Select the result, then click “Deploy”. A few seconds later, the plugin will be installed.
Step 2 – Create the Connected System
Before you can use OpenAI services, you’ll need an API key. Browse to https://beta.openai.com/account/api-keys and register for an account if you don’t have one already. You’ll need to retrieve your API key once this is done.
In your Appian Application, create a Connected System
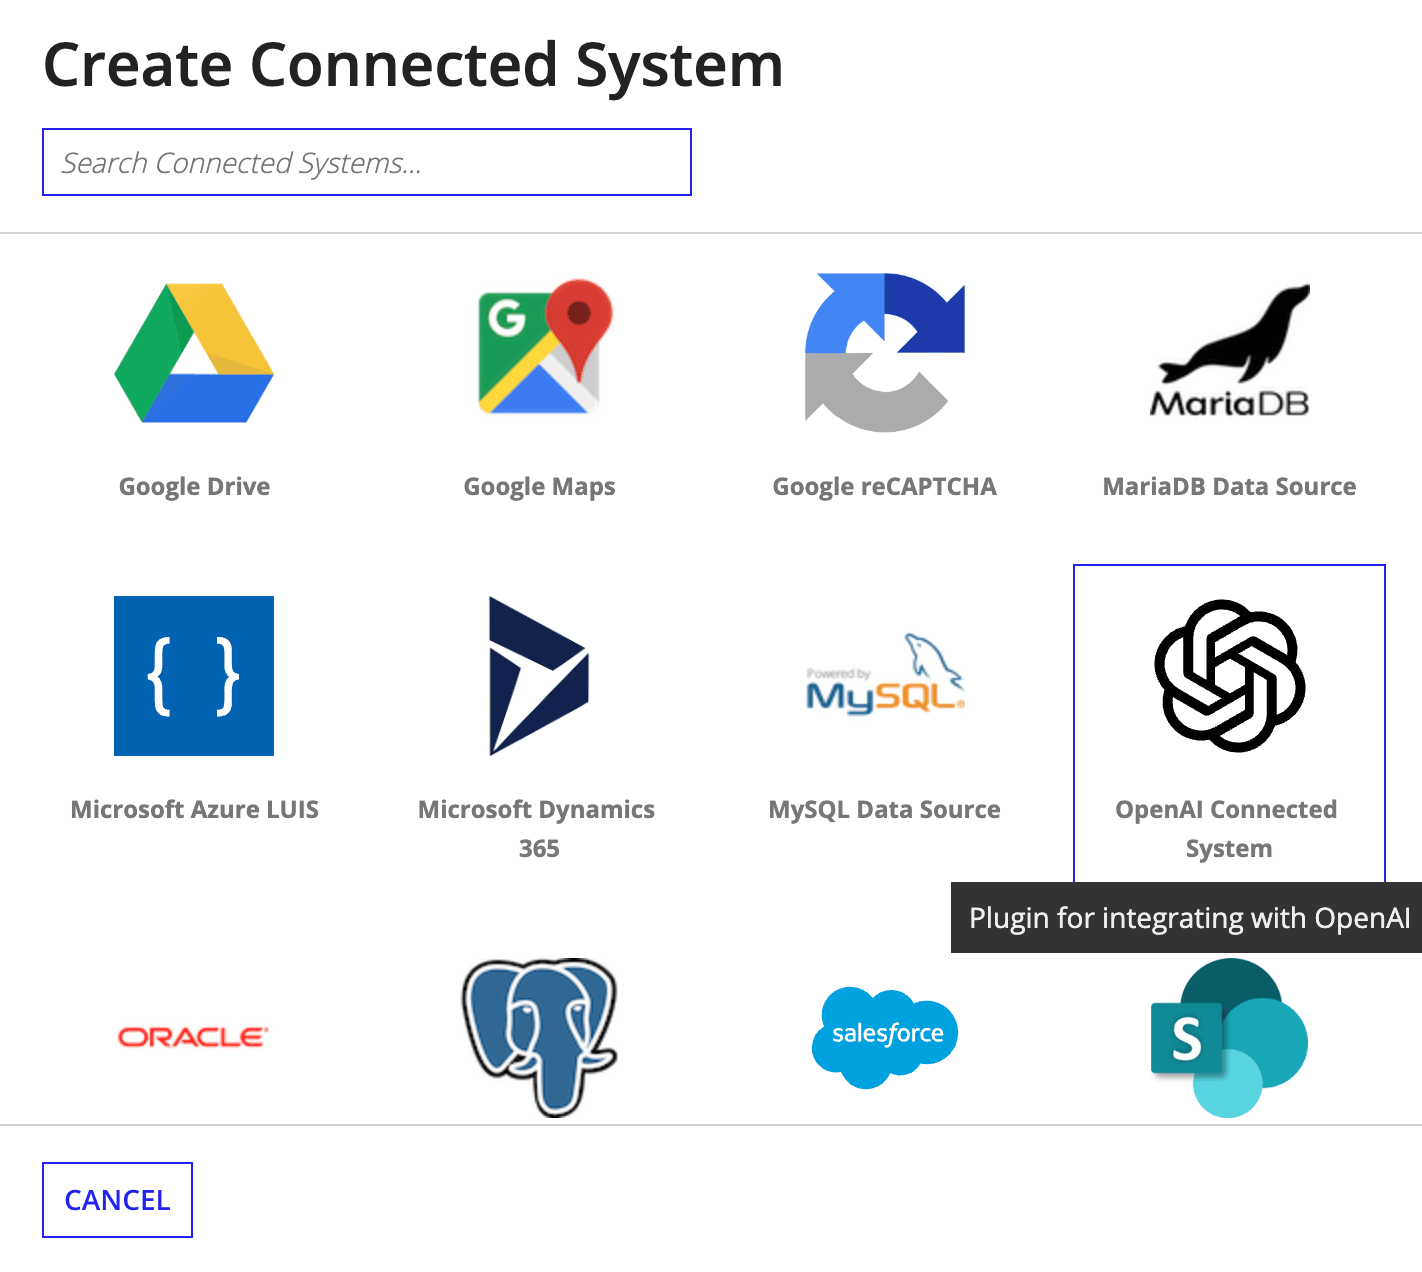
After installing the Plugin, you’ll see a new option for the OpenAI Connected System.
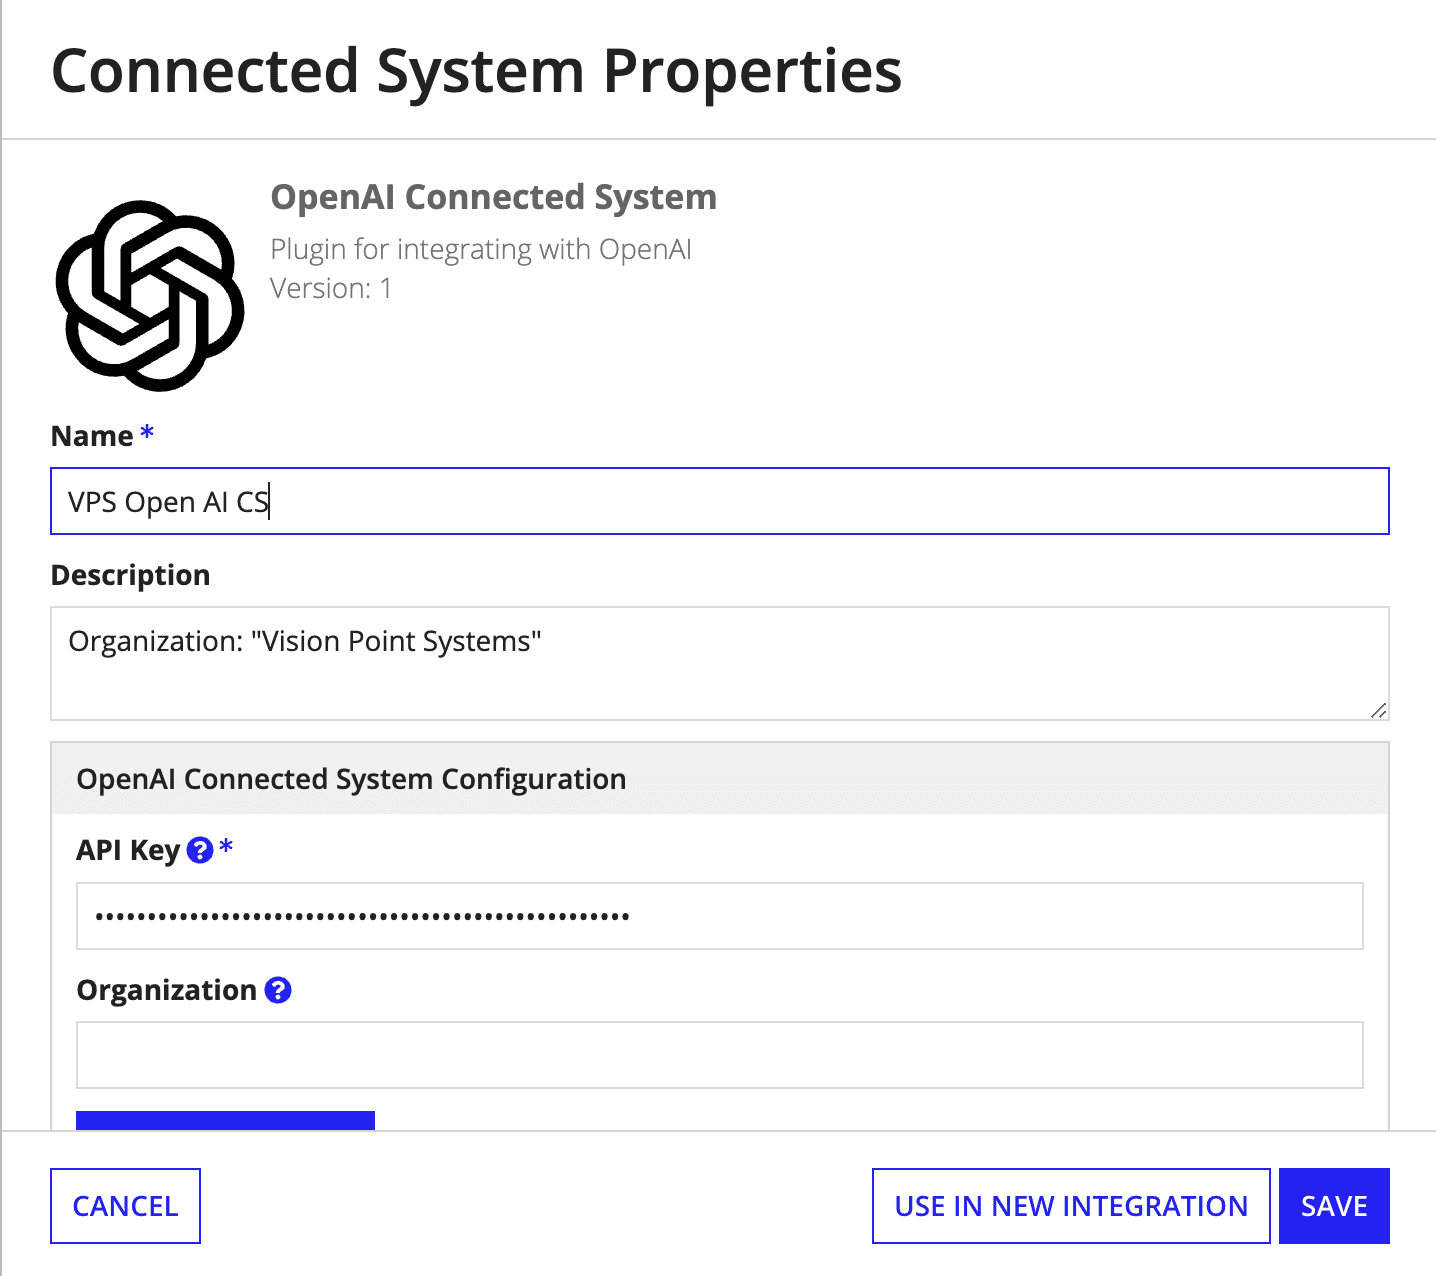
Give the Connected System a name, and paste in your API Key. I had a problem when trying to paste in my organization, so I just left that blank for now. Next click “USE IN NEW INTEGRATION” to build your Integration Object.
Step 3 – Build the Integration Object
Once the new Integration Object builder appears, give your Integration Object a name and a folder, and be sure to select Open AI (Modifies Data) for the Operation.
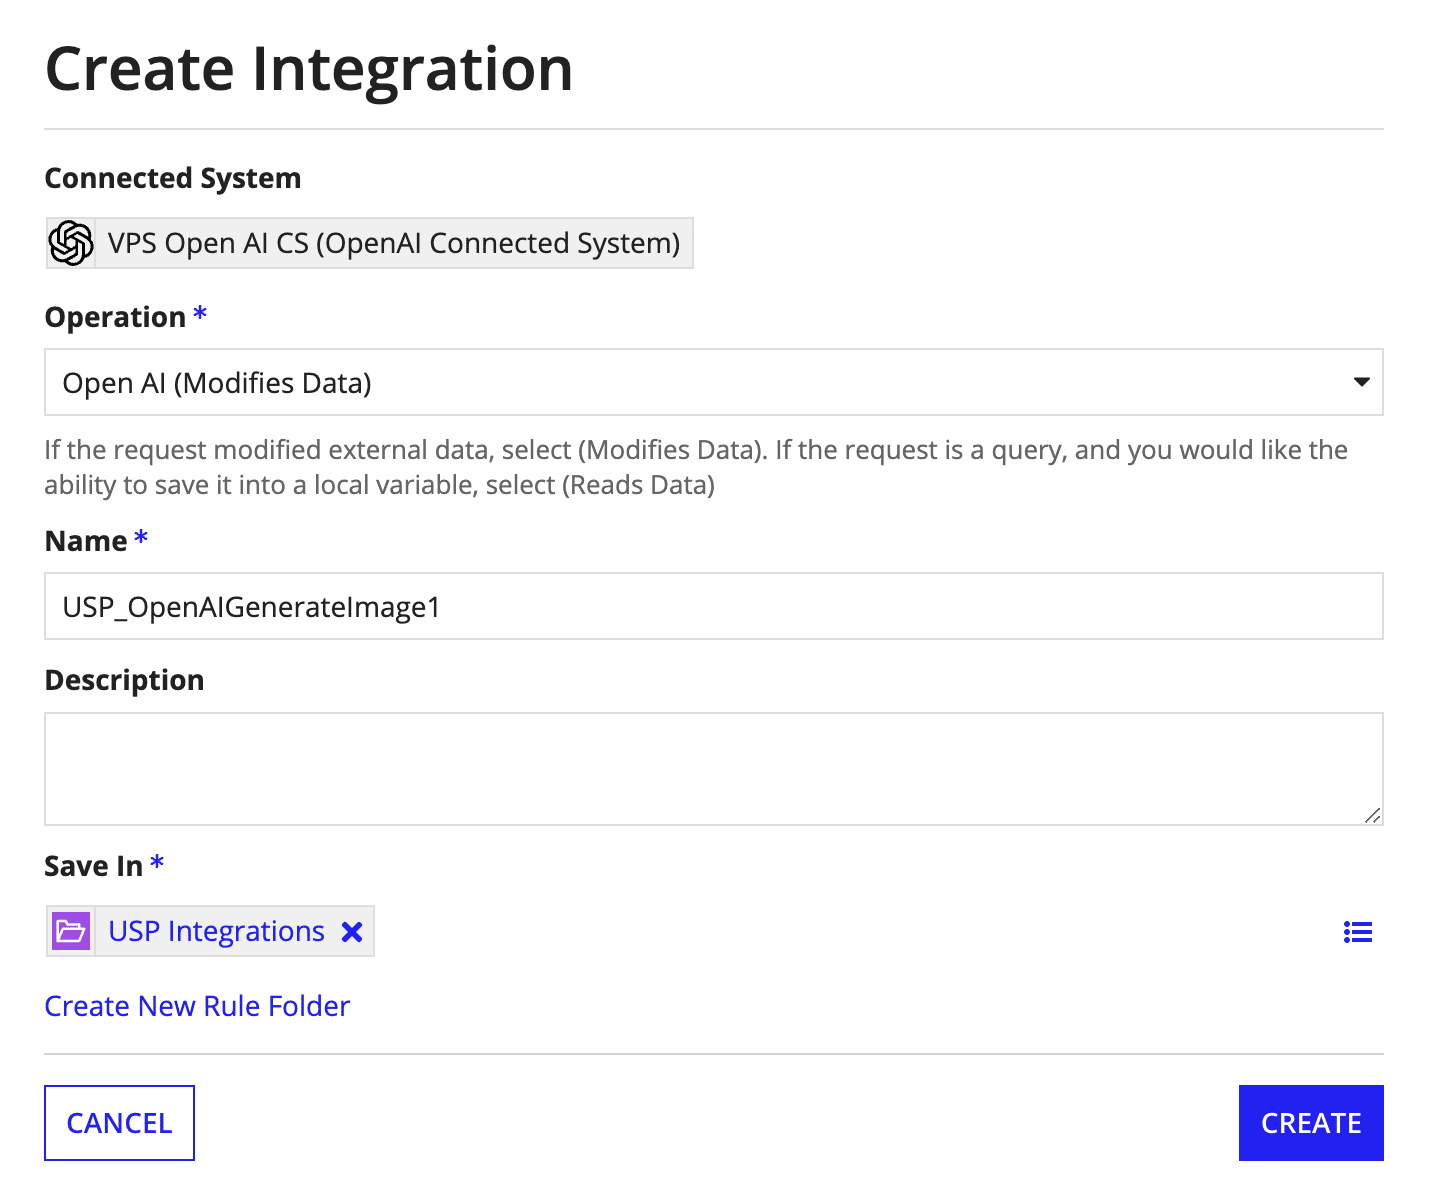
Next click “Create”.
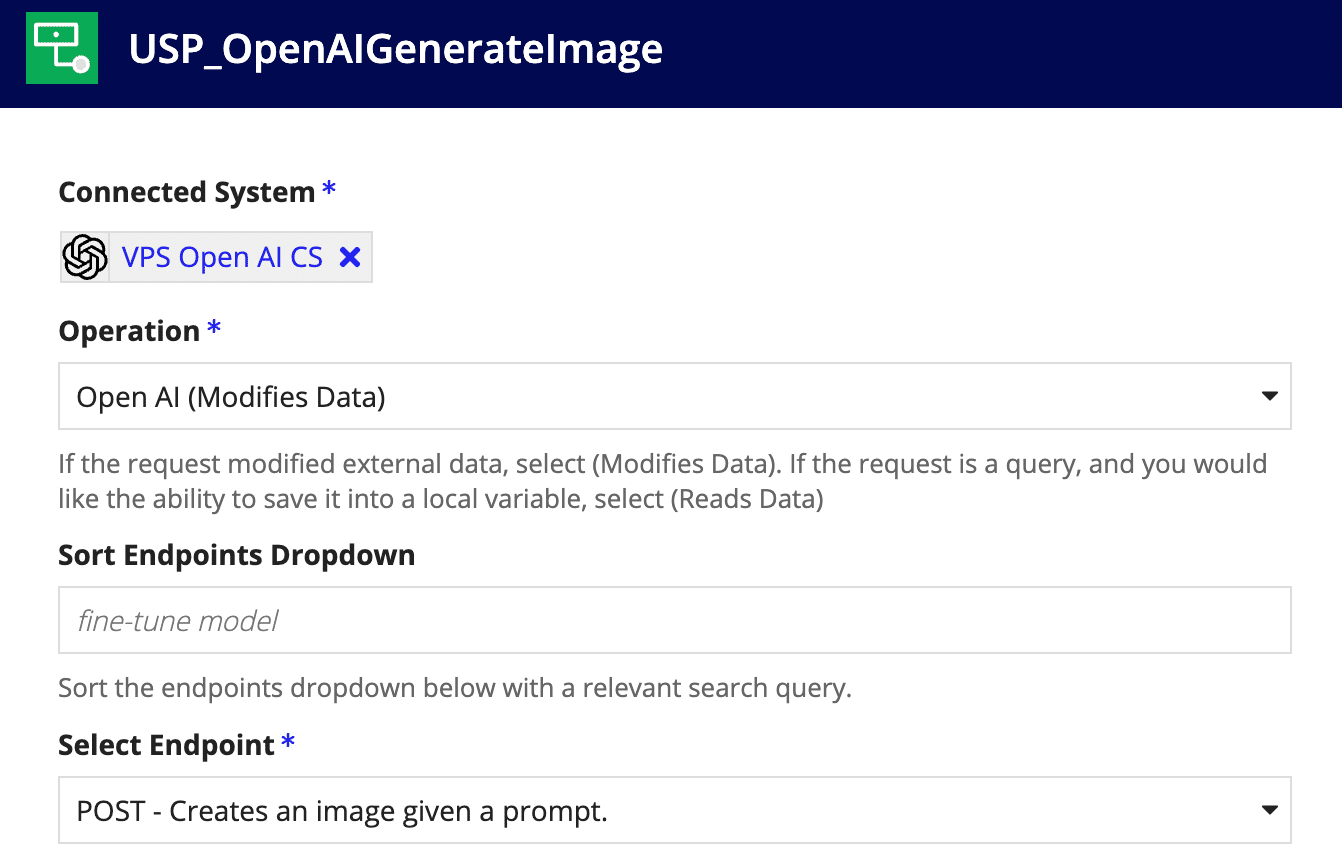
You’ll see an option to select the endpoint. In our case we want “POST – Creates an Image given a prompt”
Now is a spot where Appian’s Low Code Integration capabilities really shine. Click the button that says “Generate Example Expression”, and you’ll see a JSON object automatically created for you that conforms to the specification of the OpenAI API. Be sure to update all the example data to something that represents a realistic request like below:
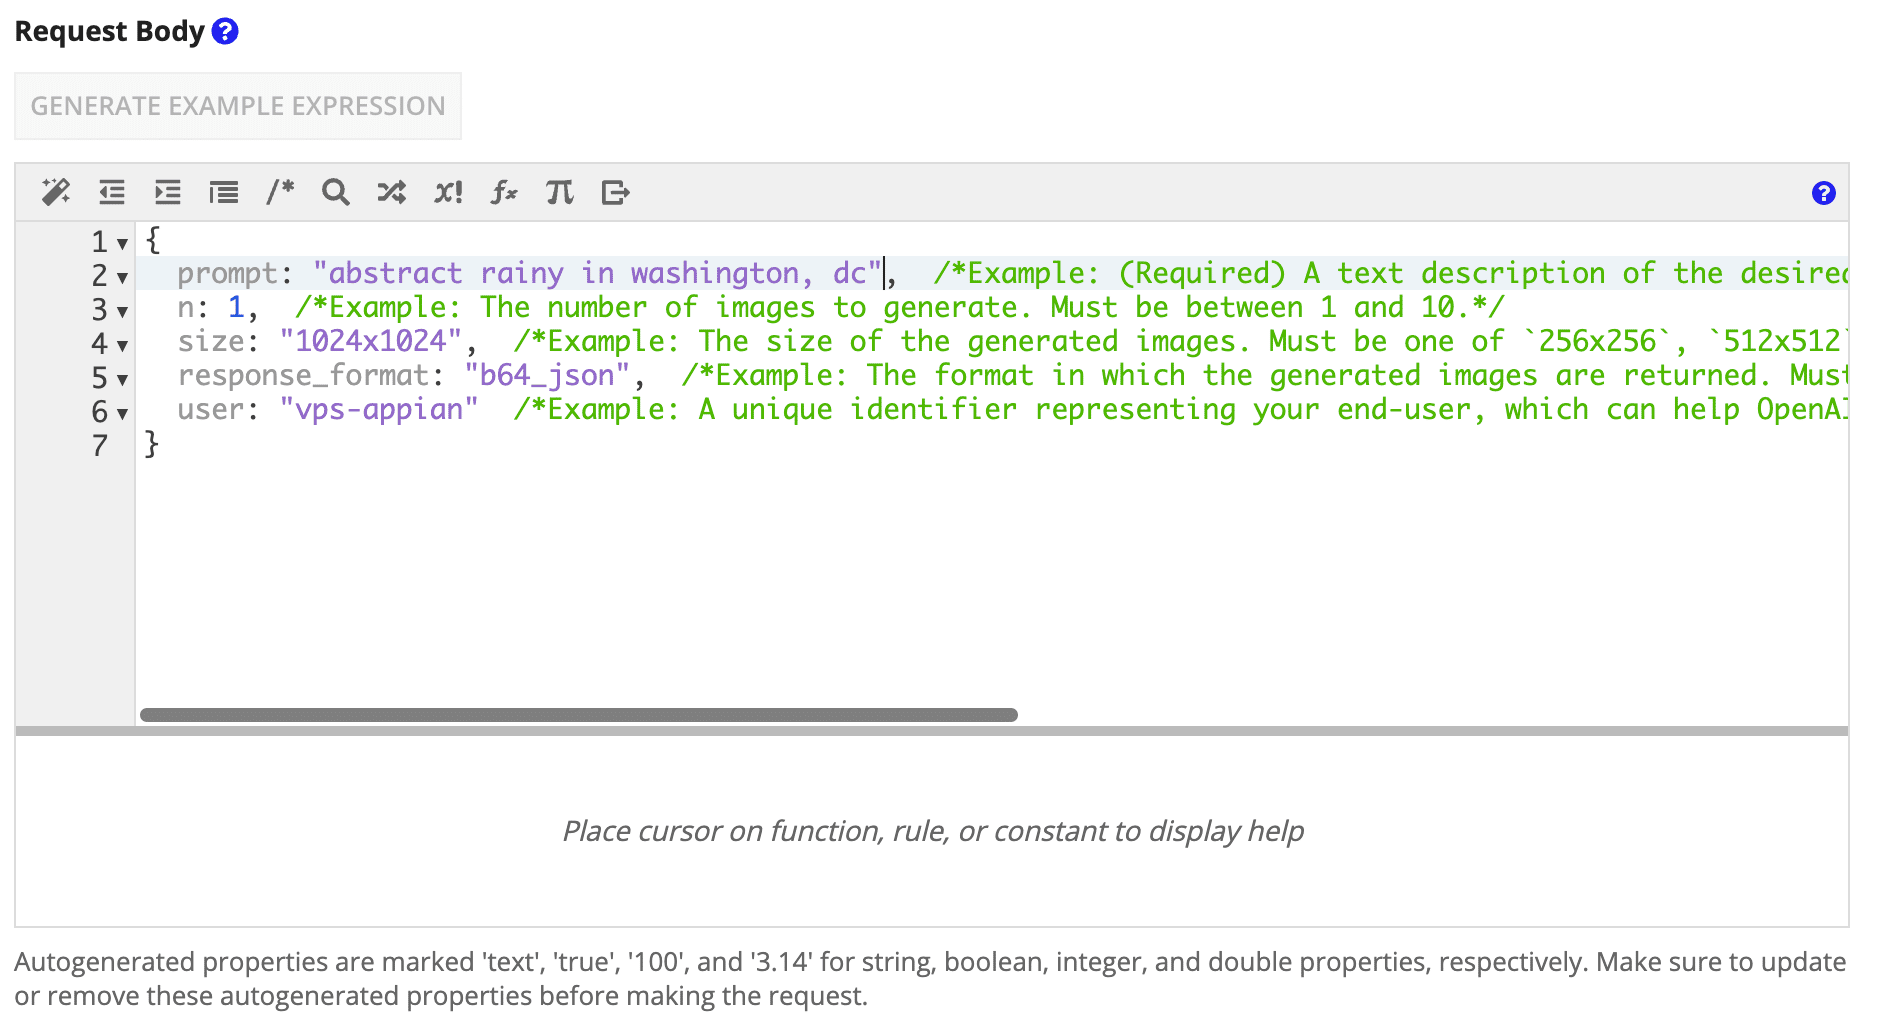
The other critical step here is to save the response to a file. Appian provides convenient handling of base 64 encoded responses in Integration Objects. Note how we specified response_format: “b64_json” in the request above. It’s important to note that URLs generated by DALL·E 2 are short-lived, so we need to save the files permanently on our own system.
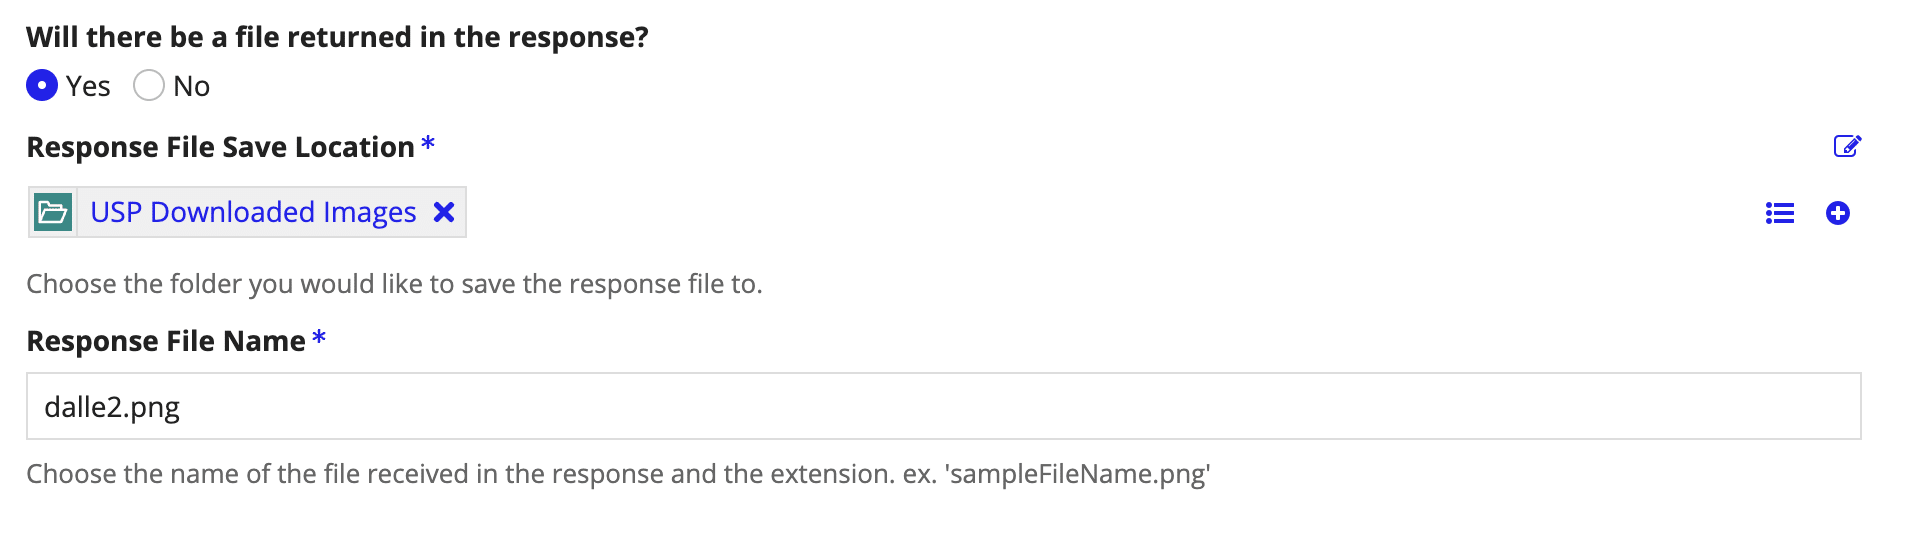
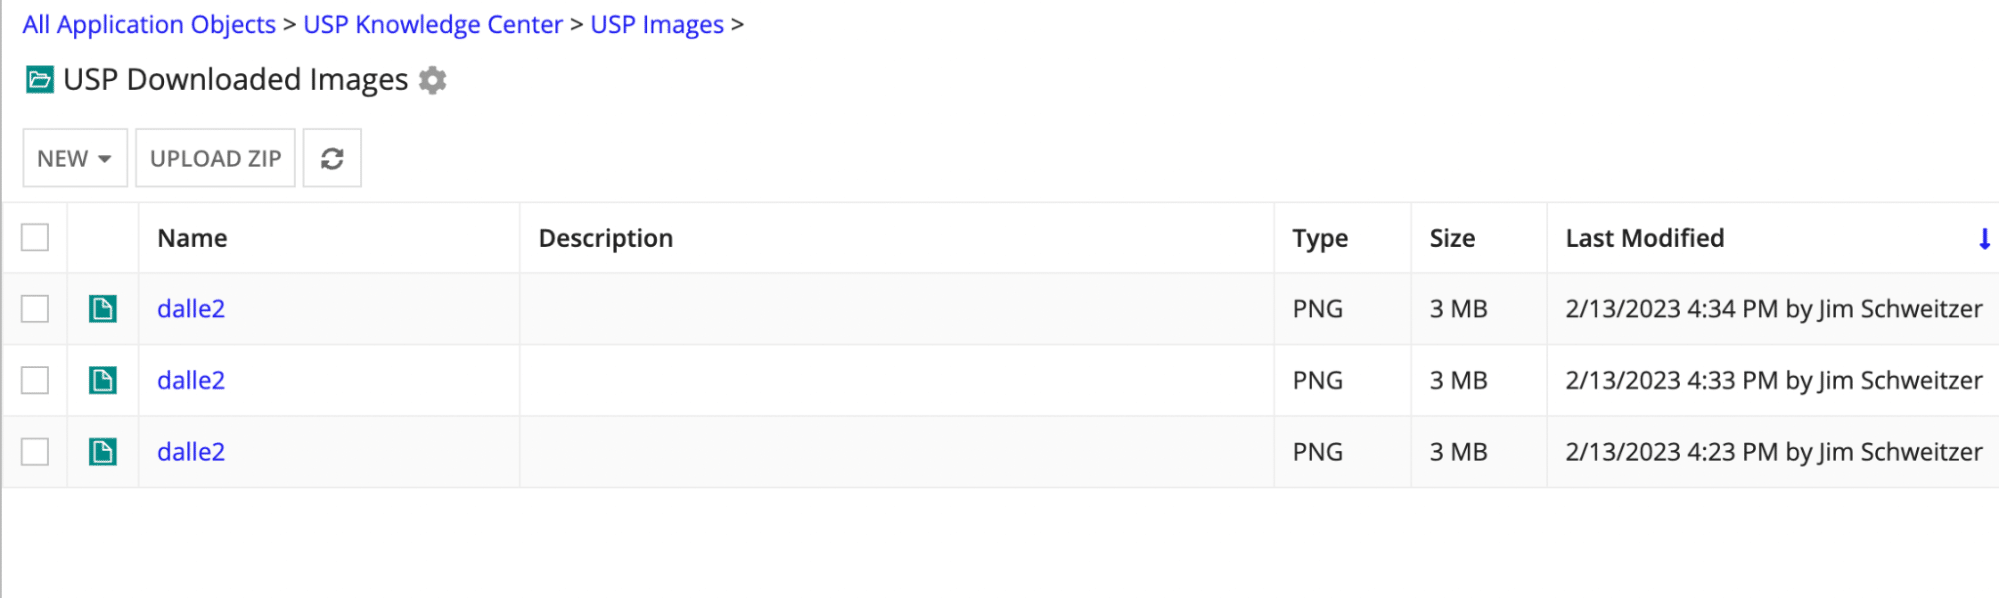
Go ahead and create yourself a new folder to hold these files. (We’ll need this later).
I’m also going to go ahead and create a new rule input called “prompt” and set ri!prompt in the request JSON.
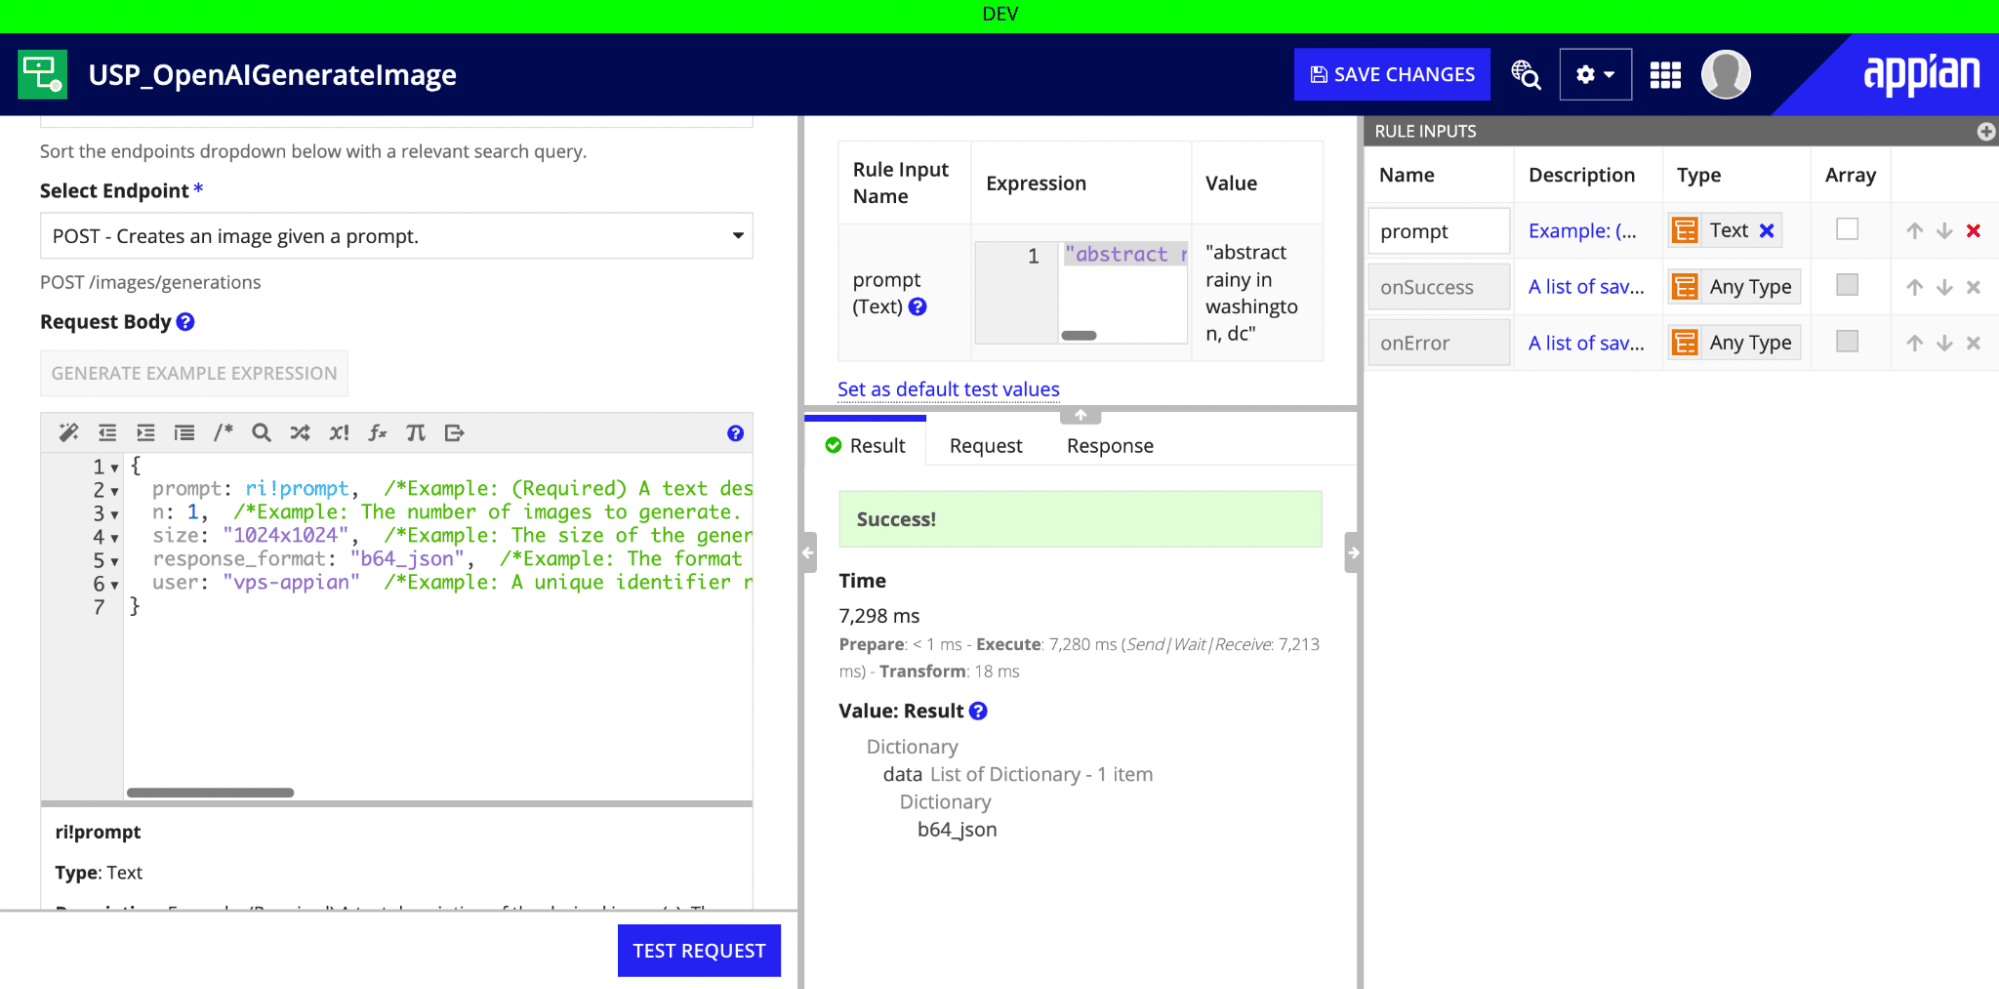
Now you can click “Test Request” and you should see a b64_json as a success result. You can also check your folder and you should see files appear for each test you run!
We have a working integration!
Step 4 – Make things interesting with a dynamic prompt.
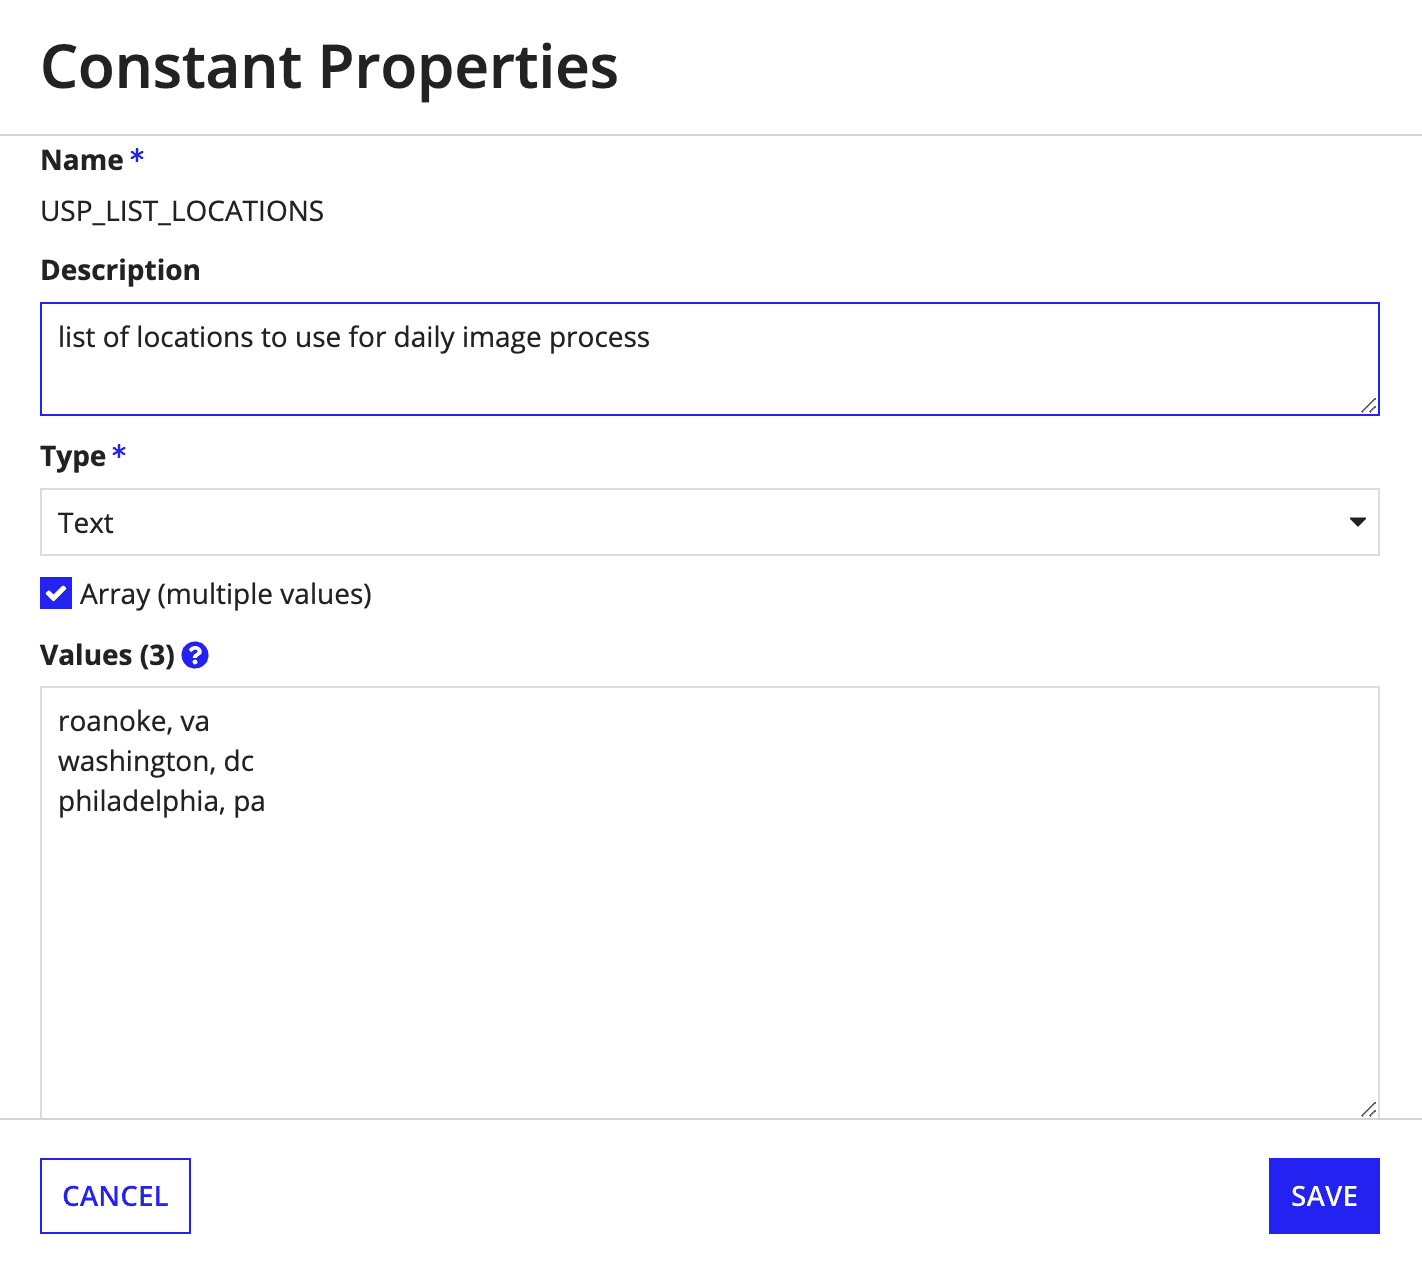
I’m going to make things interesting with a couple bits of information to feed into my prompt. First, I’m just going to make a list of locations representing where VPS has offices by creating a new Constant.
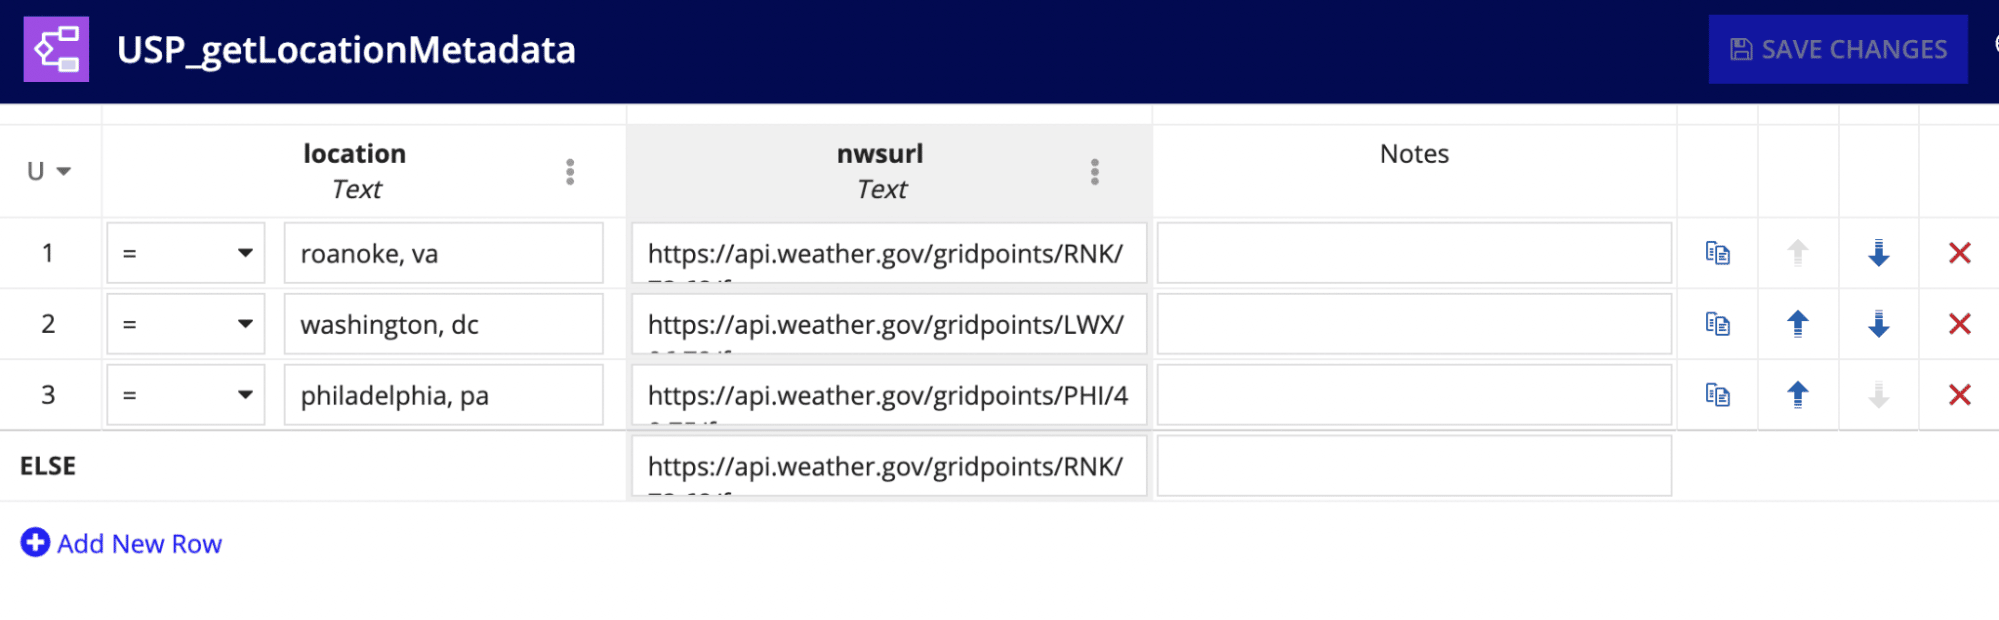
I also said I want to get the weather and incorporate that into the daily prompt. I’m going to use the NWS API for this. Each location in the US has an API that looks like https://api.weather.gov/gridpoints/RNK/73,68/forecast. For simplicity sake, I’m going to map a predetermined API to each location using an Appian Decision table.
Next we’ll build a basic Integration Object for the NWS API call. This one doesn’t need a Connected System – just use a basic HTTP Integration Object.
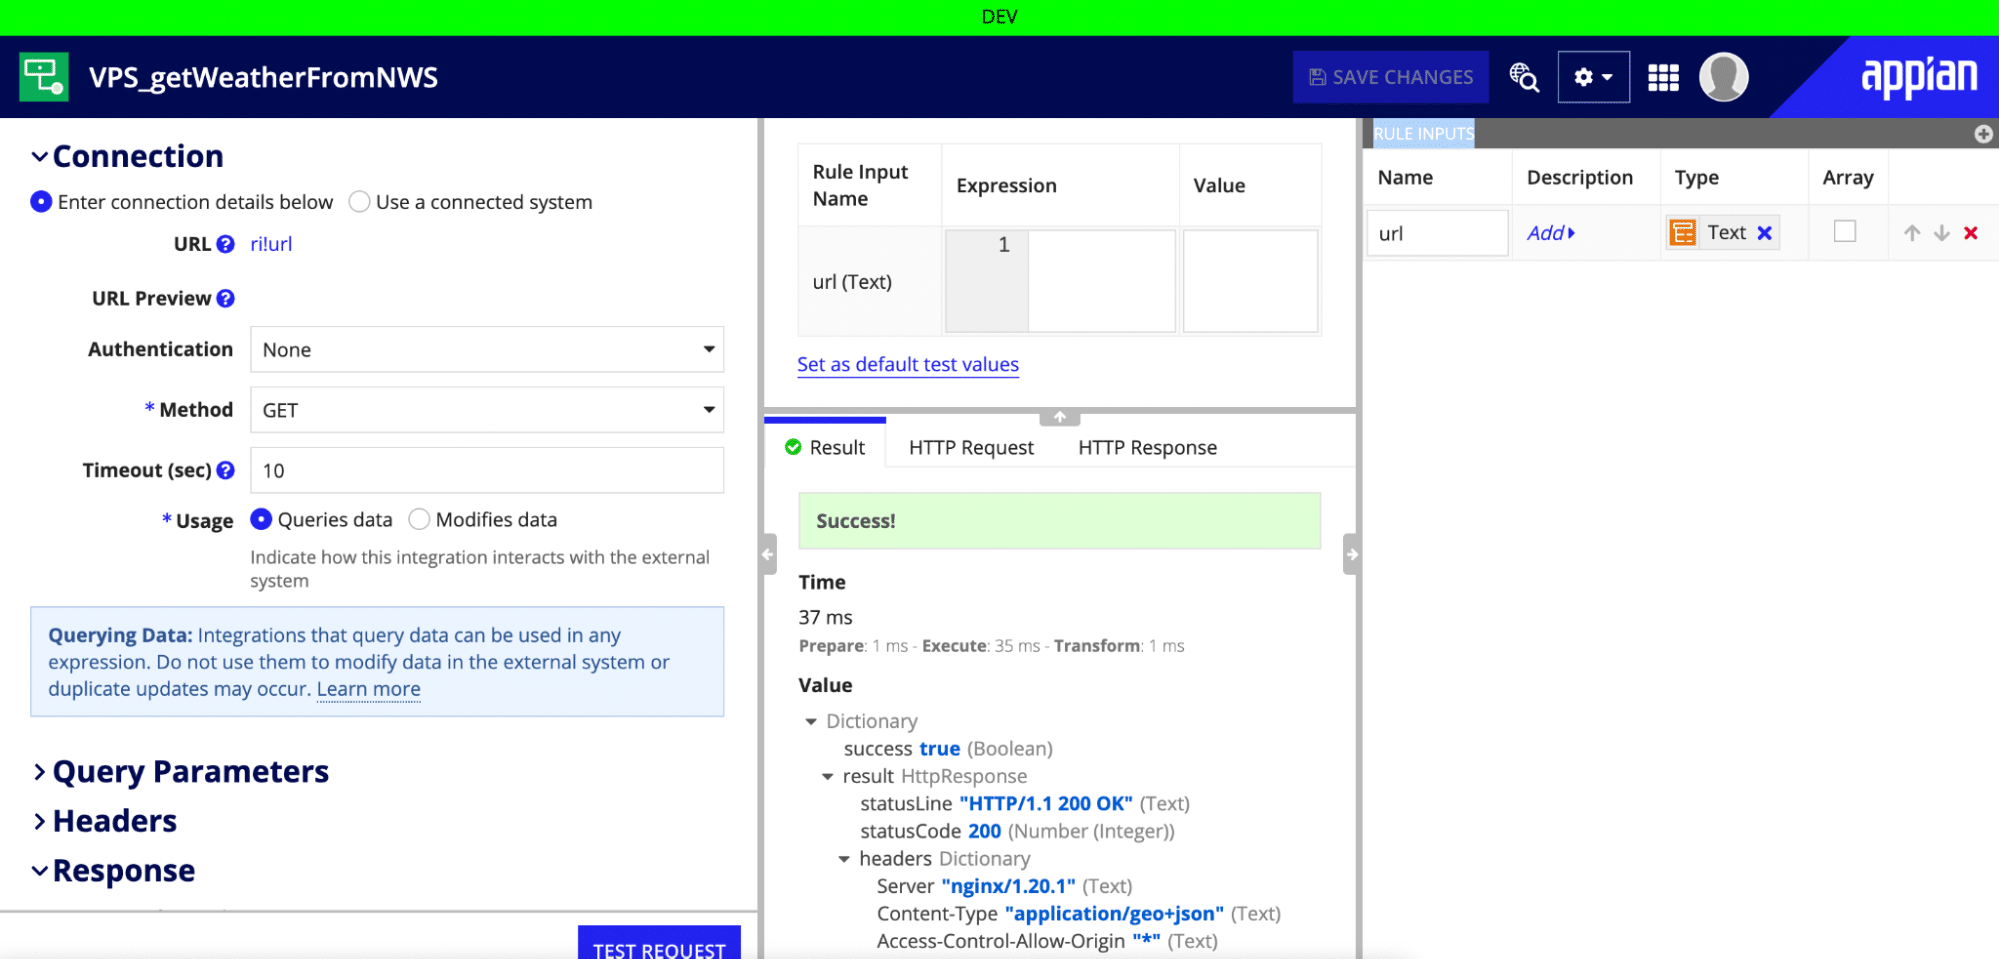
Make a rule Input called url and set that to be the URL of the Integration. Make sure to set your response to “Convert JSON to Appian Value” for easier handling later.
Now I’m going to generate a fun little Appian rule that picks a random location from the list, calls out the weather API, and builds a prompt string. Here’s what that looks like:

Break that down line by line:
- locations: cons!USP_LIST_LOCATIONS – This is just my list of locations
- randomIndex: floor(rand(1) * length(local!locations))+1 – This randomizes the list to check how many options there area and pick a whole number index within that range
- randomlocation: index(local!locations,local!randomIndex) – Gets the location at the selected index
- weatherURL: rule!USP_getLocationMetadata(location: local!randomlocation) – Calls our NWS Integration Object
- todayForecast: rule!VPS_getWeatherFromNWS(local!weatherURL).result.body.properties.periods[1].shortForecast, – Parses the data structure of the NWS API to get the short forecast description
- “Abstract image of ” & local!todayForecast & ” in ” & local!randomlocation – Construction of our Prompt
Step 5 – Set up a Process Model to run on a Schedule
Now we’re set up for possibly the world’s simplest process model.
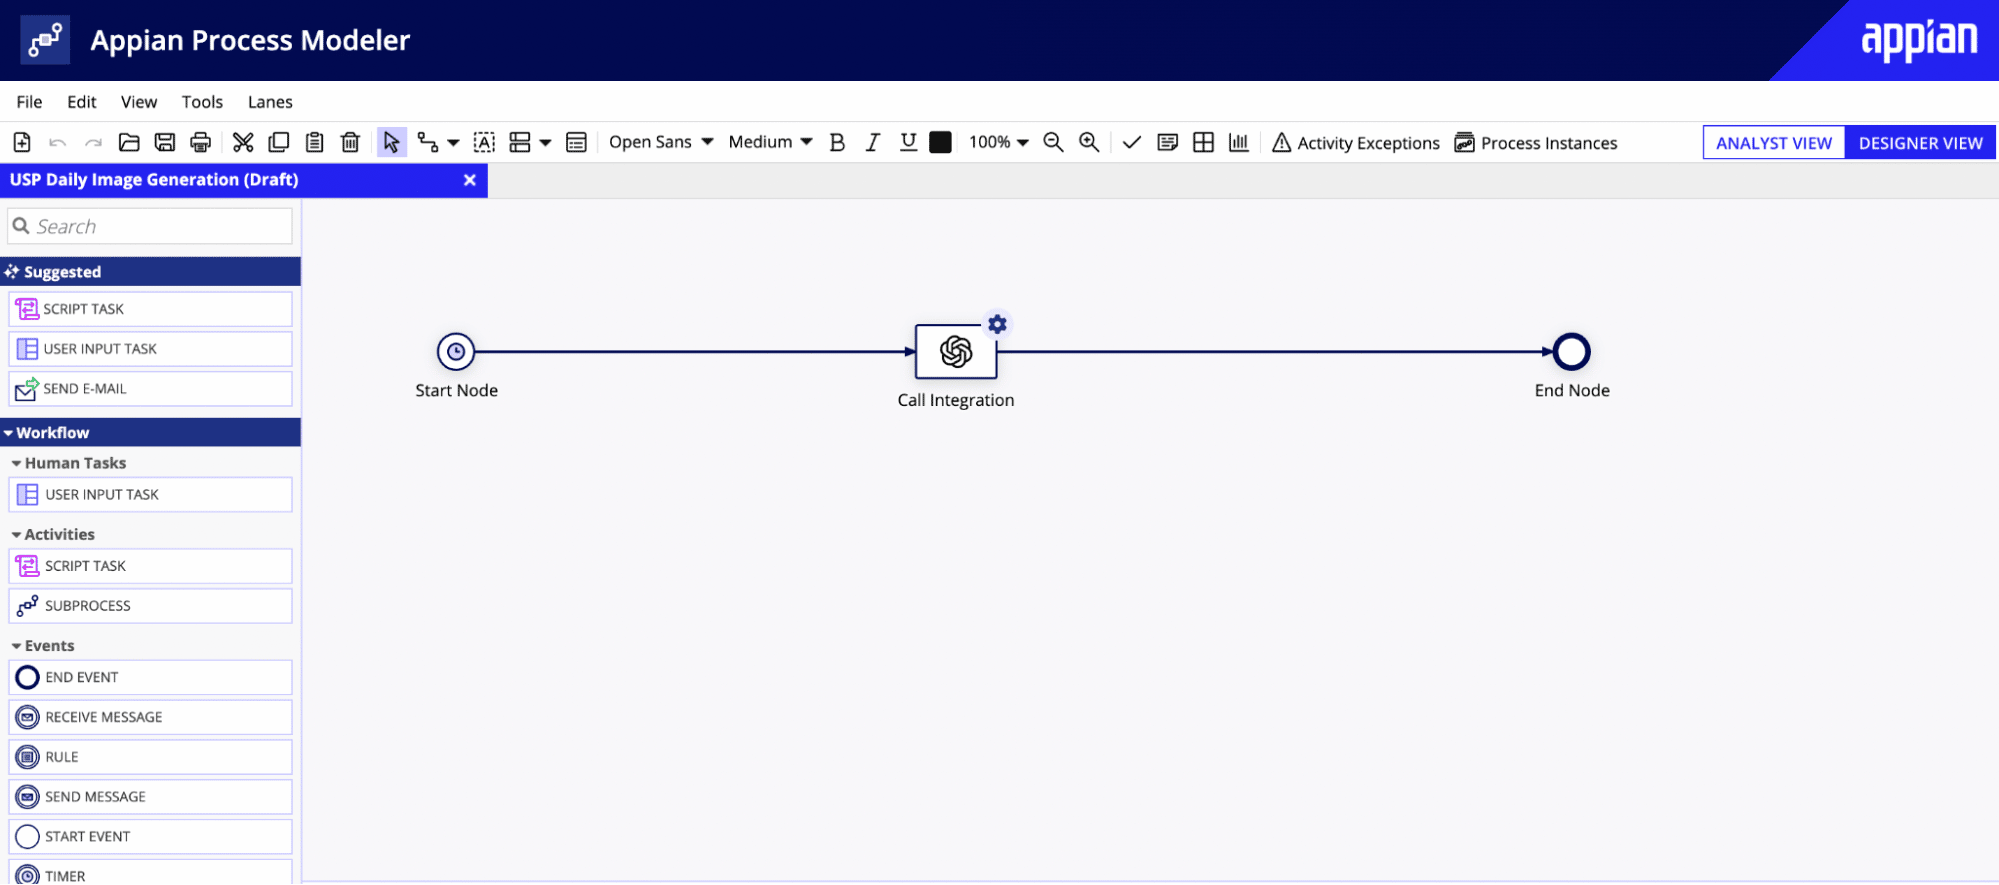
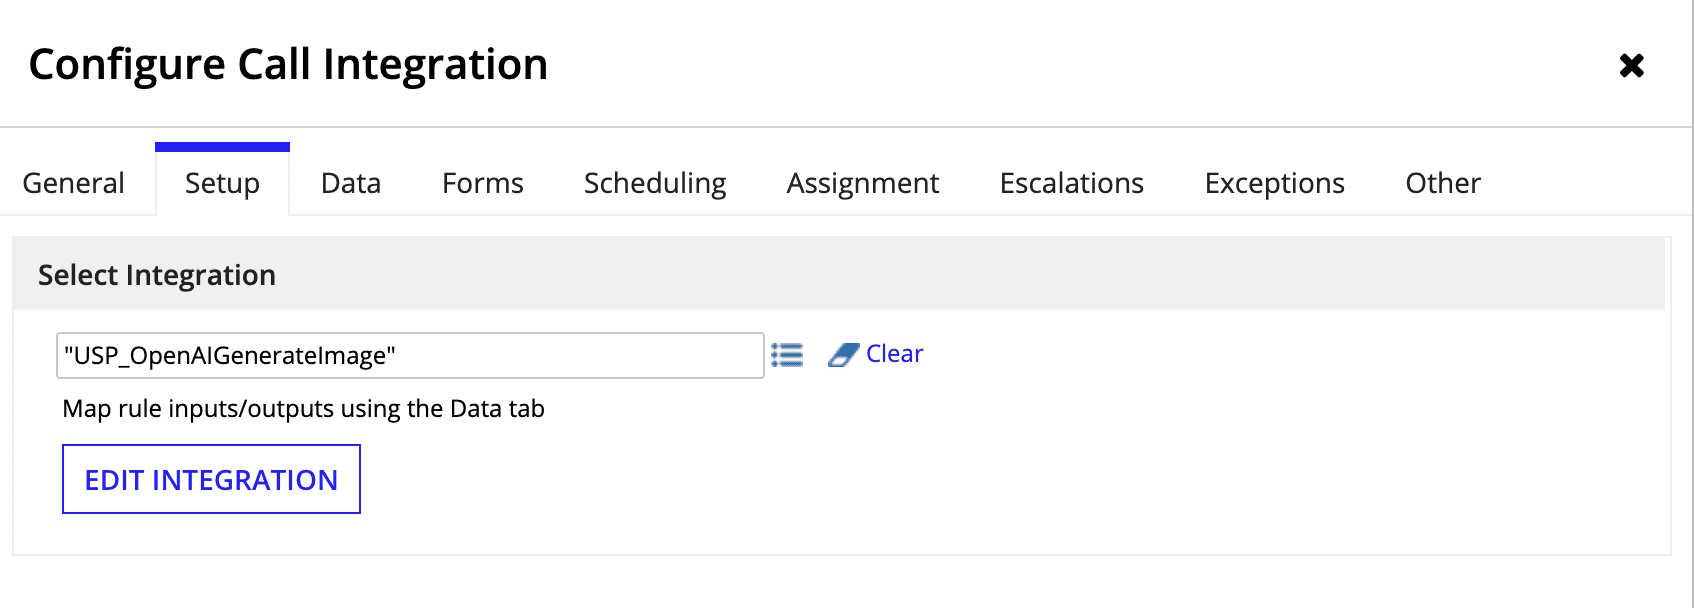
We’re going to use the Call Integration Node and select our main Integration Object in the setup tab.
Now on the Data tab, we automatically see our input “Prompt” that was setup in the Integration Object.
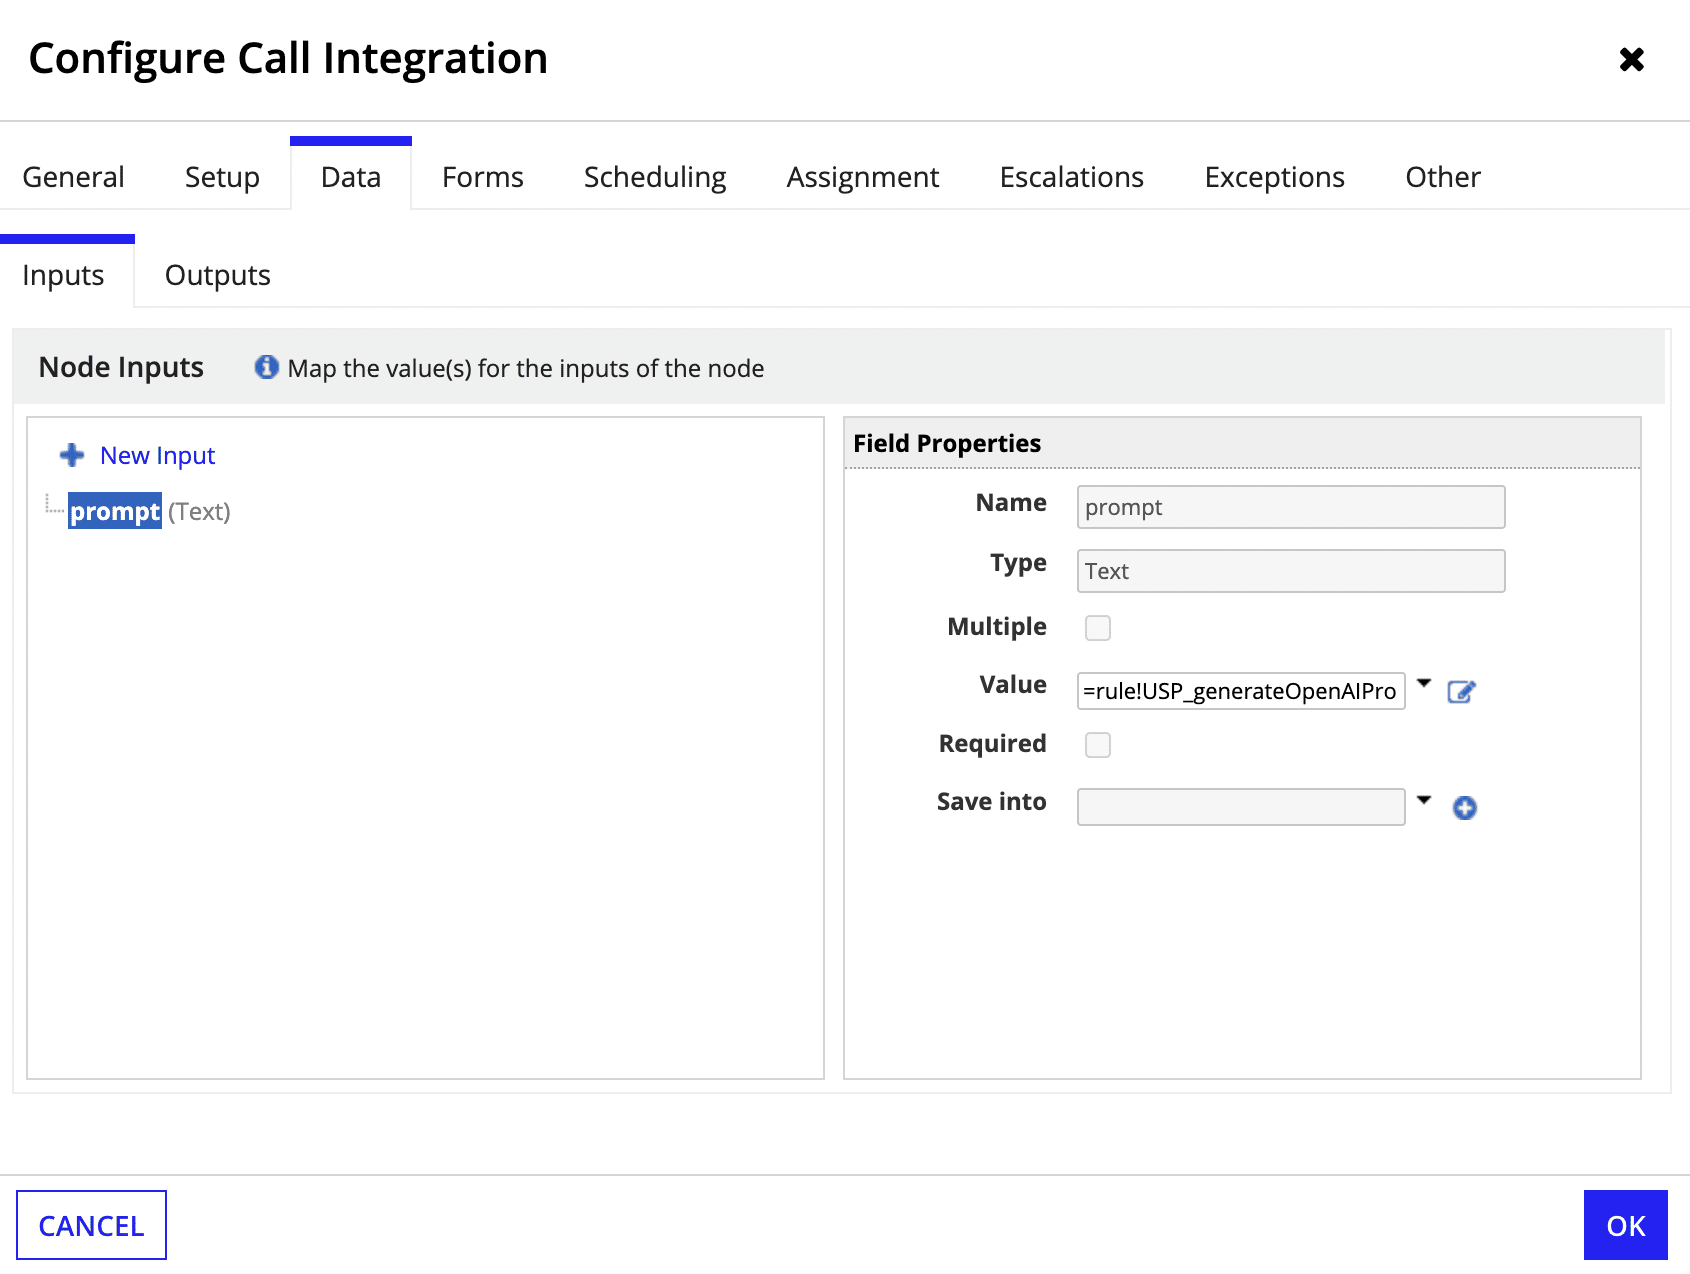
Just set the value of this input to the prompt generation Expression Rule we created in Step 4!
Note, that this integration does need to be called from a process model because it saves a document.
At this point you can Save and Start Process for Debugging. You should see another new file dropped in the Folder we created in Step 3.
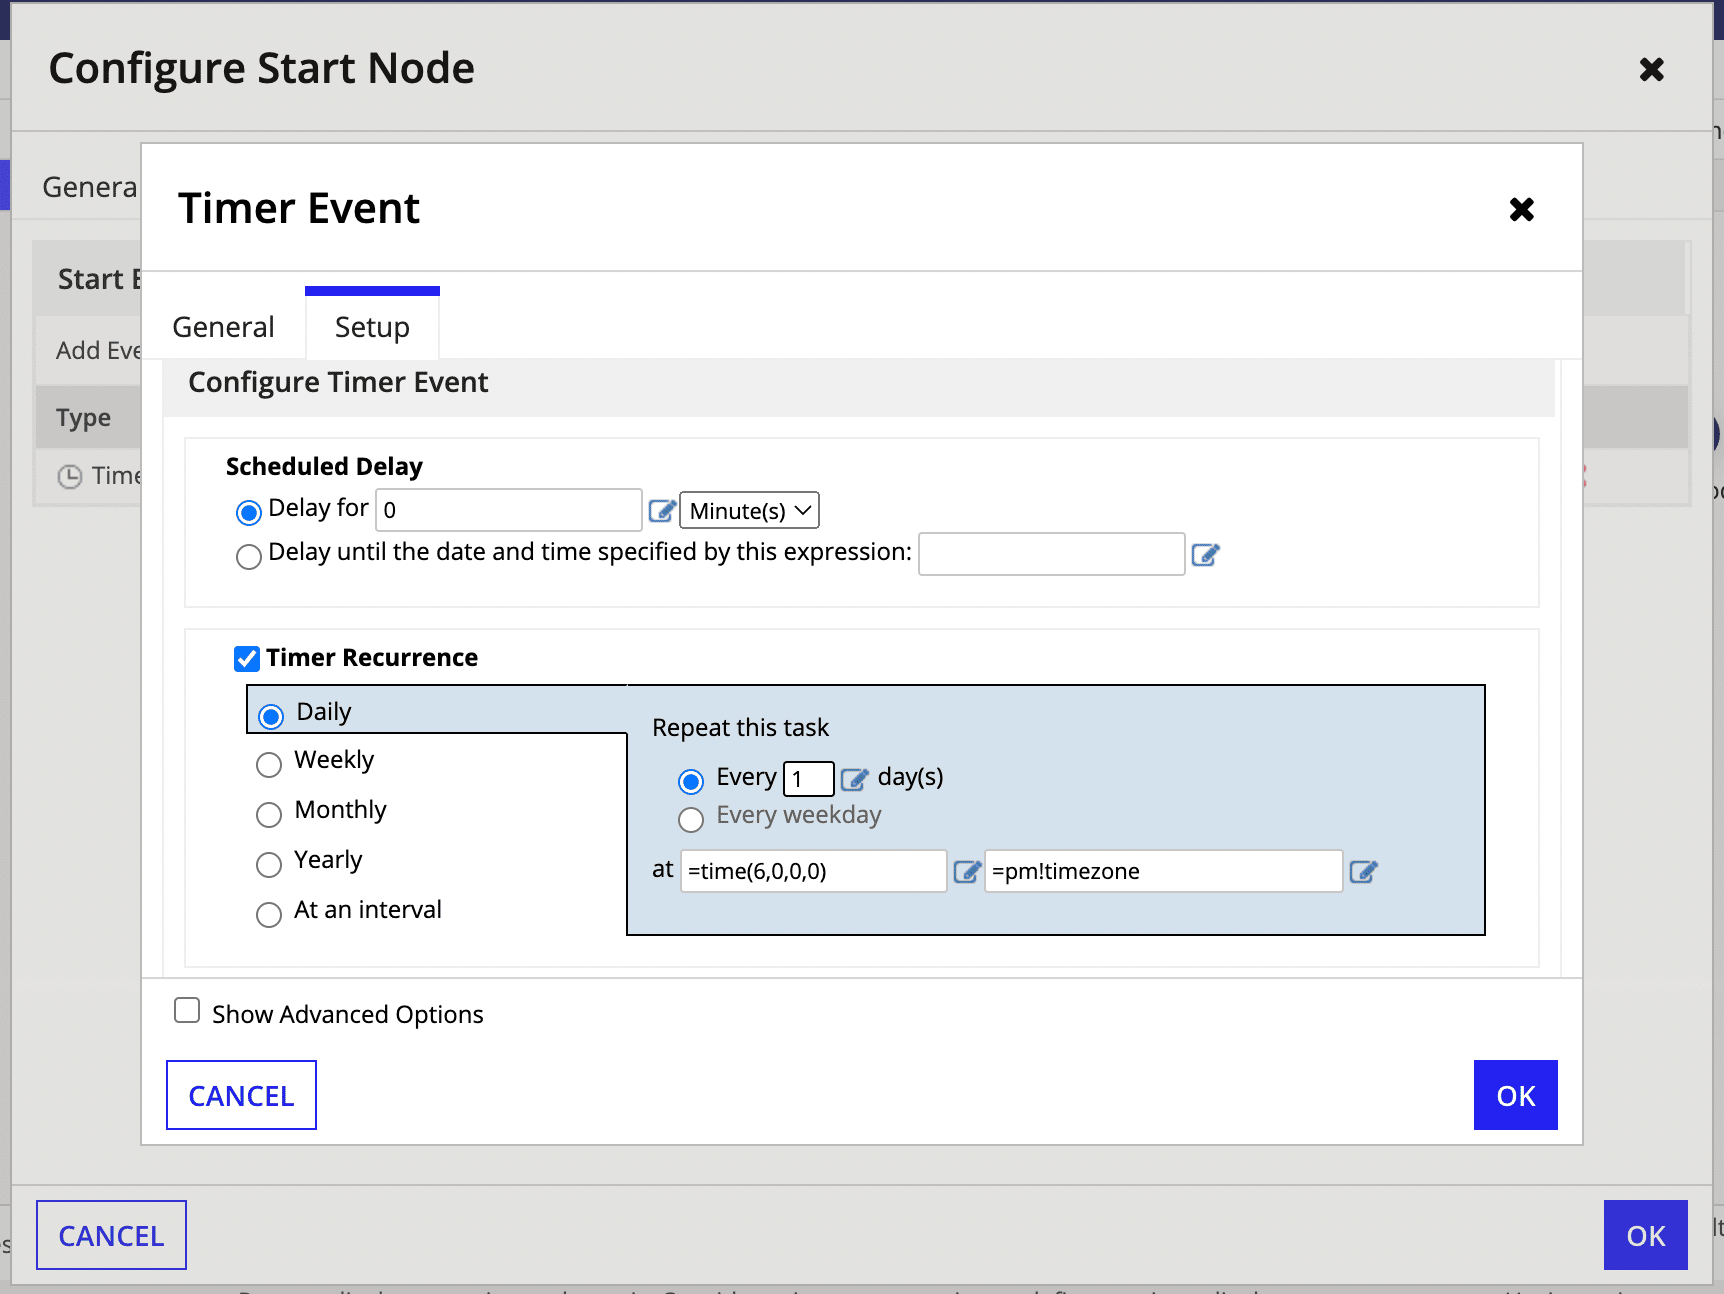
The only other configuration for the process model is to run it on the Timer. For this, just click the Start node and Edit Trigger. We’ll set it to run every day at 6am.
Step 6 – Bring it all together
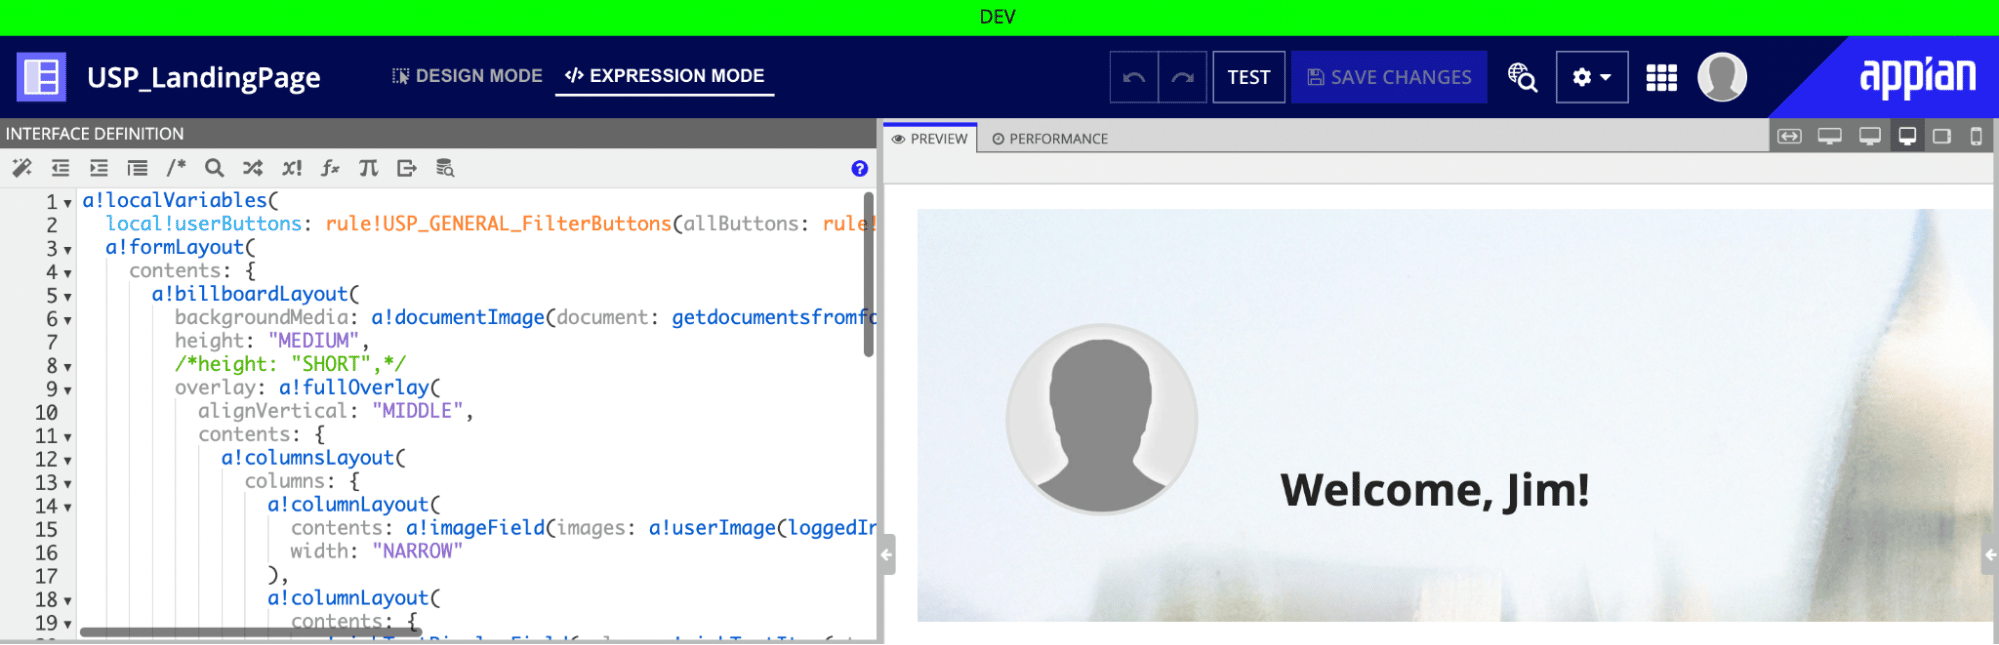
For loading the latest image, we’re going to use that Folder we created in Step 3. Previously, we had the Billboard Layout set to a Constant pointing to set document. I’m going to change this to get the newest file in a folder that is set by a New Constant.
Here is the final view! Note the Capitol building representing Washington, DC and a bright sunny sky captured in an abstract representation.
Every morning, the team at VPS will be greeted with a new rendering representing our various bases of operations.
I’ll need to go back and do some document cleanup for old images and make sure I have proper error handling, especially if the OpenAI API is unavailable, but hopefully this will inspire some to explore some interesting use cases for integrating AI into Appian’s Low Code platform!